Robot Design Contest Simulator
Here you can drive robots without having to worry about damaging physical property or being impaled.
This project was part of a recruitment phase for the HKUST Robotics Team. We used Qt for the GUI and Box2D for physics. The public-facing side of the project is uploaded online, and the desktop applications are available for download, but the source code is kept hidden. This post will provide some context and thought processes behind the design.
Context
Every year, the HKUST Robotics Team will host a set of training sessions followed by an internal competition (aka a Robot Design Contest or RDC) for trainees to test their mettle and skills. Trainees are segregated into mechanical, hardware, and software divisions, each division training a different skill set. In the RDC, trainees are grouped such that there is a fair distribution of trainees from each division.
Our RDCs generally work as follows:
- Seniors construct game rules and game field (combining elements of ABU Robocon, MATE ROV, and NXP Cup Smart Car competitions). Usually the game is in a 1v1 (team vs team) format, which makes for a competitive and riveting atmosphere.
- Trainees read and understand game rules.
- Trainee teams construct, wire, and develop their robots to play the game described by the game rules.
- On game day, teams bring in their robots to the constructed game field and compete.
- Afterwards, trainees are evaluated by peers and seniors.
This year, the RDC game involved a robot tasked with picking up tennis balls and ping-pong balls from a basket. The robot needs to navigate a complex field with various obstacles.
Under normal circumstances, the training and RDC are held in a face-to-face mode, so that trainees are actively engaged and participating. But due to the Covid-19 pandemic and restrictions set in Hong Kong, we had to move the aforementioned events online.
With the RDC online, mech, hardware, and software divisions became more segregated. As trainees could not access our robotics lab, materials, and tools, the mech and hardware divisions had to settle with drawing SolidWorks/PCBs which are then reviewed and assessed by seniors. In the software division, we tested candidates' technical and collaborative skills with the RDC Simulator.
In the rest of this post, I'll use the terms "trainee" and "user" interchangeably. I'll also use the term "User Program" to refer to the program that software trainees are tasked to write.
High-Level Overview
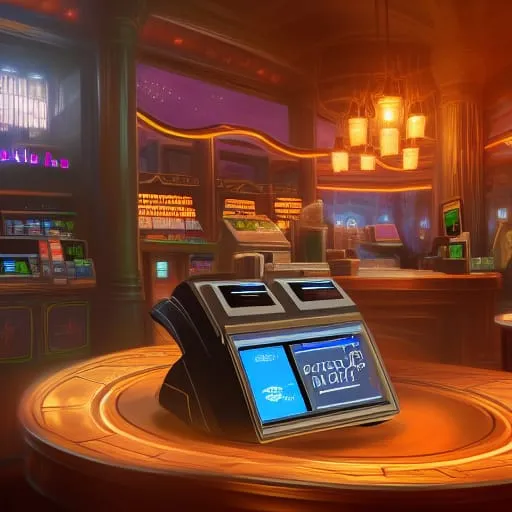
To give an idea of what the simulator looks like, here's a little annotated screenshot of an early version:

Its core features?
- A simulation area. This is where the robot is displayed and simulated. The position of the robot and its enabled sensors/motors are drawn, along with the bounding boxes of the obstacles. (Yes, collision detection exists.)
- Components display. This lists the values of various sensors, useful for debugging. Most sensors have numeric values. The camera is a bit special, and attempts to render a 3D image (by perspective transform).
- Configuration: We want trainees to be able to configure compile options (although the choice of compiler itself is fixed, GCC for Windows/Linux, clang for macOS). Trainees can also select the folder where their program code is stored.
- Playback controls. Trainees have some control over the playback: reset, start, and stop. (No pausing though.)
- Logging. This is where logging is displayed, log messages from both the simulator and user program will be fed here.
With this GUI in mind, the basic user flow for trainees is:
- Write code in an IDE of their choice.
- Open the simulator program.
- Select the folder where their code is stored.
- Click the "Run" button.
After pressing "Run", the simulator does the rest of the magic. It compiles the user's code, runs it in a subprocess, and connects with it via standard I/O. The simulation takes into account user commands and physics, simulating at roughly 40 FPS (rather slow, but it'll have to do >_<).
In a later version, there is a "Demo" mode which allows trainees to see how many points they've accumulated according to the game rules.
Planning
This year's RDC was held from November to December 2020. We only started developing the simulator in August. Since we lacked time and had to make room for studying, we had to flesh out and plan the simulator early on. We came to the following conclusions:
- The available sensors and motors are limited (max 1 camera, 4 magnetic sensors, 5 line sensors, 4 IR sensors, 2 motors for wheels, 1 grabbing mechanism, 1 throwing mechanism).
- The simulated chassis (robot body) is the same for all software teams. Each body has a rectangular shape and a cow-eye wheel near the back.
- The advanced mechanisms (grabbing/throwing) are the same for all software teams.
In robotics, a program is usually compiled then transferred over to a microcontroller. The program typically has direct access to control all the necessary peripherals and actuators (e.g. GPIO pins to read button input and toggle LEDs, functions to tell a motor how fast to spin). But this year the trainees do not have this grand luxury.
Instead of writing a program that can touch the peripherals and actuators, trainees write a program which communicates with the simulator via standard I/O. In a microcontroller, GPIO pins can be accessed and read directly; but in the RDC simulator, GPIO data is provided from standard input. If an object is detected, the GPIO pin outputs a 1. Otherwise, it outputs a 0.
What is GPIO? General purpose input/output. In layman's terms: communicating with 1s and 0s. An example of a sensor which uses GPIO is an infrared (IR) sensor, which detects if an object is present within a certain distance in a fixed direction.
I won't describe the communication model between the simulator and user program in detail, since it's a bit convoluted and messy. (Although you can still check it out.) But suffice to say, there are advantages and disadvantages. An advantage is that the simulator and user program are decoupled, so the simulation would look nice and appear smooth. A disadvantage of our implementation is that the two programs (simulator and user) run asynchronously; and due to timing issues, this means that the simulation runs differently each time we hit "Run" (even without setting any randomness to our input).
This disadvantage seems to heavily outweigh the advantage; but in our defence, it simulates the real world of robotics perfectly. Even though the microcontroller processors are designed to be deterministic, sensor input and motor control are almost always non-deterministic (i.e. random) to a certain degree. :P
The communication model was inspired by Codingame's turn-based games. However, Codingame's turn based system provides all available input every single turn. In the RDC emulator, we only provide input if the user program requests it. Why? Well... in retrospect, we could have sent all available input... but by the time we realised this, it was a bit too late to change, otherwise we would break a lot of the code trainees have already written. Codingame's turn-based model is certainly much cleaner though.
Developing the Simulator
Project Management
We used our good friend GitHub projects and GitHub issues for project management and issue tracking.
.")
Some general thoughts looking back:
- The kanban boards that GitHub projects provides turned out to be quite effective in organising to-dos. It allowed all our project members to see the active and completed to-dos.
- One addition I made was adding a "Priority To-Do" column to help better prioritise our to-dos.
- Automation was pretty handy. When I closed an issue or linked+merged a pull request, the relevant card in the GitHub project would be automatically moved from to "Done".
- The milestones feature wasn't too bad as it helped group to-dos under similar milestones. But in the end, we didn't really check up on it and ran over some deadlines. Perhaps it is more effective if paired with regular progress updates and meetings, but we had neither of those here.
- Unrelated to GitHub, but I decided to set up a
.clang-formatfile and standardise formatting, because it's that important. :P- Qt has a nice ClangFormat plugin. One of my other teammates managed to set up Qt on VSCode, so he has direct access to all the other nice VSCode stuff.
Coding
We used Qt as our GUI framework since most of us were familiar with it. We would have gone with C++20 had QtCreator fully supported it, so we had to be content with C++17. Some points of interest:
QGraphicsViewandQGraphicsItemare pretty nice. Just pay attention to your axes and frame of reference.- We used
QPlainTextEditfor the logging widget. It's pretty good.- We extended it with a custom slot for pushing log messages and highlighting them depending on a log level.
- e.g. "Warning" messages are orange, "Error" messages are red, and "Success" messages are green.
QProcessis also pretty nice and feature-rich. I ended up inheriting from it and tacking on some custom signals and slots.- Qt's UI designer is a blessing.
- Since we derived new classes for
QGraphicsView(for drawing the simulation) andQPlainTextEdit(for the logger), we had to promote widgets in the UI designer. The process was rather straightforward, I think.
- Since we derived new classes for
- C++ parameter packs are pretty fun to write, as they have all the flexibility of varargs combined with type safety.
- For those curious how we simulated the camera, we used perspective transform to render a 2D image in a 3D style. The only limitation was that there was no height information, so a tall pole would still appear flat at ground level. Nevertheless, it was good enough to generate input for the camera sensor. Its main use case is for detecting the black lines along the white/black track.
QTransform::quadToQuadandQImage::transformedwere really helpful here.
Physics
For physics, we ended up choosing Box2D. We decided to go with this library since it seemed like a simple, mature 2D physics library. We didn't go with 3D engines as they seemed overly complicated and probably require more computational power, not to mention testing and debugging.
One pain point I encountered was that the b2vec2 constructor does not have default values! This caused me grief, since objects were beginning to fly everywhere. And it took a LONG TIME TO DEBUGGGGG!!! I had assumed that since it was a C++-based library, it would have reasonable defaults. Well apparently not.

Documentation
There are various sources for documentation on the RDC simulator. We have documentation related to setup, installation, and administrative procedures and another set of documentation for coding a user program.
Being a rather detail-oriented person, I have become quite fond of checking and double-checking documentation. This may seem overly unnecessary, but it helps to have a link to point to when someone asks a question.
Conclusion
At least two software trainee teams managed to complete the game and score full points.

- So was the RDC playable? Yes.
When developing the simulator, we didn't have a working program to test if the game can be completed. So it was a relief when some teams managed to finish.
- Did it meet our objectives of testing trainees' technical and soft skills? Also yes... to some extent.
- Some groups had free riders. There was a case where a group only had one teammate remaining...
Some wisdom to takeaway:
- Plan things ahead. It's better to resolve problems earlier on than later down the road. If your product is used by a lot of users, changing something drastic later on may affect your users negatively.
- Be organised. Know what to-dos exist, which ones are more important, and when they should be done.
- Remember to initialise your Box2D
b2vec2s unless you want your physics intentionally broken.
Also, some final reflections:
- We had planned a roadmap but started lagging behind. Perhaps the goals were slightly unrealistic, or we didn't consider the stress of the exam period. In my eyes, we could have pushed things a bit earlier so that the trainees had more time to plan. The final features (Demo Mode) were slightly rushed at the end.
- Coding-wise, I think we did okay. The only thing to improve was our intellectual capacity so that we could write more sophisticated simulations. Some sensors were hacked together rather awkwardly. But learning takes time.
- Probably one thing we could've done better was provide more tips for the trainees. I heard from other seniors that some trainees had difficulty merging their code (which was one way we tested collaborative skills).
TrebledJ


Passionate problem-solver, software engineer, infosec enthusiast, and amateur music composer. I enjoy teaching others and thrive on learning new things. When not immersed in programming, I can be found taking walks, reflecting on life, and occasionally indulging in CTF challenges.
Related Posts

ABU Robocon 2021
Reflections on participating in my second Robocon competition. Working with people is tough but sometimes rewarding.